Monday, April 13, 2015

Make your own Grabber Arm!

Got something that's just out or reach? Now you can make a grabber arm that can help you retrieve things!

IMG_1022.JPG

Materials:
  • 8 craft sticks
  • 2 milkshake straws, cut into quarters
  • 2 skewers
  • Tape
Optional:
  • Pipe cleaners
  • Rubber bands
  • 2 cups
Procedure:
1. Create the four beams by sticking a craft stick into the straw pieces are each end leaving a small gap in the straw between the two craft sticks.
2. Break off a small piece of skewer and tape it at the edge of each straw piece in order to help reinforce them.
3. Attach two of the beams together by sticking the pointed end of the skewer into the straw pieces in the beams. Do this for both pairs of beams.
4. Put more straw pieces on the end of the one side of the "X" created by the attached beams for both sets.
5. Line up the upper and lower parts of the beam so that the newly attached straws overlap and stick a skewer piece though the straw pieces. Use tape and skewer pieces to reinforce as necessary.
6. Design the grabber claw. This can be more pieces of crafts stick, bent pipe cleaners, rubber bands or anything else you can think of that will help you pick up an item.
7. Test your grabber by trying to pick up the cups.

Engineering involved: This grabber is a simple machine that serves to show the importance of design. While the basics remain the same, this grabber can be customized to pick up different types of objects with different types of claws. Just like any good machinery, it can be redesigned for the optimal effect, whether it needs to be able to hook into something or have a better grip using the rubber bands. And just like a real engineer, it's up to you to experiment and figure out the best way of completing a task. Good luck and happy testing!

For more pictures and information go to: http://www.instructables.com/id/Extending-Grabber/?ALLSTEPS

Friday, April 10, 2015

Gumdrop Structure Challenge!

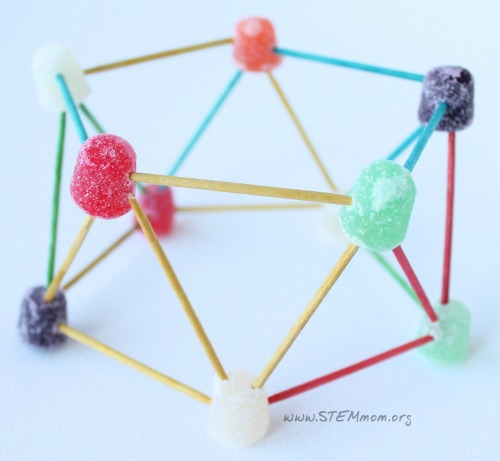
The challenge: Using only 20 toothpicks and 10 gumdrops, design a structure that can support the weight of a textbook.

Materials needed:
-20 toothpicks
-10 gumdrops
-newspaper or something to keep table surface clean

Further challenges (optional):
-A time limit
-A minimum height the textbook needs to be off the table

The Science:
Hopefully, after completing the challenge, you can see several scientific and engineering connections to this activity. First of all, we can see that triangles are STRONG. This is why many bridges around the world are made out of triangles. Next, we also learned that larger bases mean more support and therefore, the structure can hold more weight.

Tuesday, April 7, 2015

Invisible Ink!!!

Ever want to create a top secret message??? Well now you can! And you can use science to do it!

Enjoying using chemistry and the following readily available kitchen items to send secret messages to your buddies!

Here's what you need to get started:
baking soda
paper
water
paint brush (or you can use your finger)
measuring cup
purple grape juice concentrate


Directions:
Mix water and baking soda in a bowl in equal quantities. Be sure to use your measuring cup here.

Then use a paint brush or your finger to paint on your top secret message to paper.
Note: you won't be able to see what you are writing! That's what makes it top secret!

Allow message to dry.

Next, to have your secret messaged reveled paint over you message with grape juice.

YOUR MESSAGE WILL MAGICALLY APPEAR!

Well, not exactly magically... 

Here is what happened:

The baking soda and water mixture you used to paint on your message constitutes a weak base.  Weak bases have high pH values and do not ionize fully.  Grape juice is an acid.  The message is written in a weak base, and this weak base neutralizes the acid in the grape juice, therefore, revealing your message! 

Enjoy sending secret messages!

Wednesday, March 25, 2015

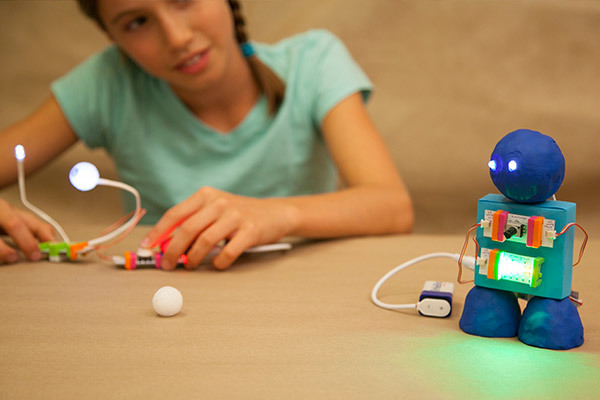
Making Big Things With LittleBits


What is LittleBits?

Learning electronics isn't an easy task. To beginners, the  jumble of wires, soldering, and different electrical components can easily scare them away. LittleBits simplifies the complexity of the hardware into electronic modules that snap together with magnets. Learning electronics then becomes as easy as putting together Lego pieces. The only limit now? Your imagination.


An introduction to LittleBits from their website


There's an ever-growing library of electronic modules for you to use. The LittleBits website features a variety of starter kits to match the projects YOU want to work on. For example, there's a synth kit for all the musicians out there, a space kit for all the future astronauts, and finally the cheapest option is the base kit where you can learn the basics of electronics and get the basic modules for your module library.

LittleBits in Action

If you aren't sold yet, here are some examples of the awesome things you can make with the LittleBits kits.

With just the BaseKit


An Art Bot:


You can even check out projects and tutorials made by fellow LittleBit users at the MakerHub!

Vijay Dhruv's FerrisWheel:


Yoo-Bin Lee's LittleLine Follower


Friday, March 13, 2015

Make your own rocket!

Have you ever wanted to fly into outer space in a rocket ship? What's the science that would make that work? Here's a small experiment that you can do in order to simulate the forces that would be needed in order to liftoff!
As you can see, the rocket moves without any energy from itself. The pulling back of the rubber band creates a storage of potential energy behind the straw rocket. Once you release the rubber band, all the potential energy immediately changes into kinetic energy to move the rocket up, up, and away! The rubber band uses up all the kinetic energy in order to return to its un-stretched shape.

Newton's laws of physics are also involved in the launching of a rocket. Newton's third law says that any action has an opposite and equal reaction. Thus, the force that you used to pull the rubber band back will be copied in the opposite direction when the rubber band jumps back to its original position. Since energy and force can't just disappear into the air, all the energy goes into the straw rocket.

The real rockets that NASA uses also follow these same basic principles. However, since their rockets are tons heavier than our straw one, they need a giant chemical reaction to create enough force for the rocket to be propelled up.

Tuesday, March 10, 2015

3D printing and medicine

3D printers can make all sorts of things, from plastic viruses to circuits to houses! One of the cool new things a 3D printer can make is something you wouldn't expect, but it helps make many people's lives easier. Keep reading to find out more!


Tuesday, February 10, 2015

Balloon Powered Car

If you ever wanted to make your own car, this is definitely a project you should check out!

What you'll need:
1 piece of cardboard (4"x6")
1 balloon
1 rubber band
1 straw (preferably bendy)

2 straws (preferably non-bendy)
2 kabob skewers
4 bottle caps

Tape & Scissors as necessary

How to make your car:
  1. Take your 4 bottle caps and poke a hole through each cap, just large enough for the kabob sticks to go through. These will become the wheels of your car.
  2. Stick one kabob stick through each straw.
  3. Put bottle caps on each end of the kabob stick.
  4. Tape the straws (with the kabob sticks in them) onto your piece of cardboard. The cardboard will become the base of your car, and your kabob sticks with the "wheels" will allow your car to move!
  5. Now, we need to find a way to power your car. To do this, stick the longer end of your bendy straw into the mouth of your balloon, and make it stay with your rubber band.
  6. Tape the longer end of the straw (near the bend) onto your piece of cardboard.
  7. Now, you can inflate your balloon by blowing into the short end of your straw. When you put your car on the ground and let the air out of your balloon, you can see it travel!
If you want to see a working demo, please check out this video:


Good luck, and have fun!