Wednesday, April 6, 2016

Egg Prank Solution

The Situation:
Egg-Experiment-Raw-or-Boiled.jpg
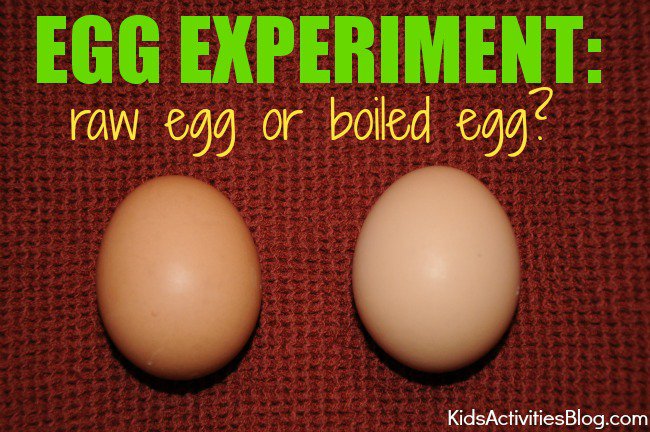
Your sibling is at it again. It’s April 1, which can only mean one thing.... April Fool’s Day pranks. You’ve been working all day boiling eggs and getting everything together so you can spend a nice afternoon decorating eggs with your best friends. However, this year your sibling decides to be extra conniving and decides to mix up your batch of boiled eggs and raw eggs. You were really looking forward to your fun day ahead, but now you can’t figure out which eggs are which because they are the same size and color! You could simply drop each egg and see if the egg is raw or boiled, but this would destroy your eggs you were going to decorate. You’re completely at loss and are ready to really teach your brother a lesson when, suddenly, you realize science always has a solution! Continue reading and find out how you can put the joke on your brother and learn a little eggcelent physics along the way.

The Solution:
  1. Obtain two eggs. Label one egg “1” and the other “2.” Place the two eggs on an even ground. A table is fine for this experiment.  
  2. Hold one end of one of the eggs with your index finger and the other end with your thumb. Gently spin the egg. Do the same with the other egg. (If you spin your eggs too vigorously, you’ll have a big mess to clean up!)
  3. While one of the eggs is spinning, touch it gently to make it stop spinning. Now do the same for the other egg. Record any differences you observe when you try to stop the eggs from spinning.
  4. Do steps 1-3 for all the remaining eggs. The eggs should divide into the two categories of what happens after they stop spinning. Organize the eggs into two batches with regards to this characteristic.
  5. You should have two batches of eggs. Now the question becomes: which egg is boiled and which is raw? Break one egg from each batch to reveal which batch has raw eggs  and which has boiled eggs.

The Science:
The solution to this problem is actually related to physics. In physics, there is a term called center of gravity which is basically where an object’s mass is concentrated so that it would balance at this point. Because the boiled egg is solid, its center of gravity stays the same. In contrast, the raw egg is liquid, making its center of gravity continually change when spinned. Eventually, the friction of the egg shell stops the liquid from moving around. Hence, you should have observed the raw egg to keep spinning when stopped and the boiled egg to stop spinning when stopped.
Alas, you have saved your eggs from catastrophe. Your sibling will have to find another victim to prank this April Fool’s Day.

For a video presentation of this or equally cool experiments, check out the HooplaKidzLab channel on YouTube. To find out more tricks and pranks to play on your friends(or sibling) this April Fool’s Day, check out: http://kidsactivitiesblog.com/category/holiday-activities-for-kids/april-fools-day-for-kids

Monday, March 7, 2016

Liquid Density Experiment

Materials:
  • 3 clear containers (such as mason jars)
  • 1 large container
  • heavy liquid (like honey, corn syrup, or molasses)
  • water
  • vegetable oil
  • food coloring
  • household items: coins, plastic beads, bottle caps, popcorn, grapes, safety pins...

Procedure:
  • Pour a cup of each liquid into the containers.
  • Use the food coloring to dye the liquids.
  • Guess which liquid will rise to the top when you mix all of them together.
  • Pour all the liquids into one jar and wait for them to separate.
  • Then predict how far each household item will fall inside the container.
  • Add in the household items one by one and see if you guessed correctly!

Explanation:
  • Density is equal to the mass of the substance divided by the volume.
  • When you pour all of the liquids together, liquids with heavier density will sink, while liquids with lighter density will rise to the top.
  • When you add the household items in, the ones with more mass per unit volume will sink lower than the ones with less mass per unit volume.

Reference:

Wednesday, March 2, 2016

Soap-Powered Model Boat

Materials:
1. A foam tray (like the kind meat comes in) or a piece of non-corrugated cardboard
2. A tray, bowl, or cookie sheet full of water
3. Liquid dish soap
4. A toothpick

What To Do:
1. Cut the foam tray or cardboard into a boat shape as shown below:
soapboat1
2. A good size seems to be about 2 inches long.
3. Dip the toothpick into the liquid soap and use the toothpick to put soap onto the sides of the notch at the back of the boat.
4. That’s it! Now carefully place the boat onto the surface of the water and watch it scoot across the water for several seconds – you’ve made a soap-powered boat! To demonstrate the boat again, you will need to rinse out the tray to remove any soap from the previous demonstration.
5. Try to answer the following questions while working with this project:
      - Does liquid soap last longer than a solid piece of soap?
      - Does warm water work better than cold water?
      - What materials make the best floating boat?
Displaying Soap Powered Model Boat.JPG

How Does It Work?
Soap is a surfactant – that means that it breaks down the surface tension of water.  As the surface tension is broken up, it creates enough of a force to push the lightweight boat across the surface.

Thursday, February 11, 2016

Tissue Box Guitar

Materials:
  • Empty tissue box
  • 3 elastic bands with different thicknesses   
  • A pencil                         
  • Tape
  • Piece of paper
  • Empty paper towel roll

Instructions:
  1. Cut the plastic covering on the center of the tissue box.
                              DSC_0109.JPG
  1. Creating the neck:
    1. Take a marker to outline a circle on the shorter face of the box. Make sure the circle is the same size as the empty paper towel roll.
      DSC_0113.JPG
    1. Cut out the outline you’ve created. The picture shows how the holes are supposed to look.
       DSC_0115.JPG
    1. Insert the empty paper towel roll in your circular hole. If the roll is loose, put tape to ensure it won’t slip around.
        DSC_0118.JPG
  1. Adding the strings:
    1. Use the rubber band and wrap it around the box for the outer strings. Refer to the picture to understand how it should look.

Picture of Add the strings
    1. For the middle strings, cut a slit at the bottom part of the neck. Then you can slide your rubber band into the slit. Afterwards, tape over where you cut.
DSC_0121.JPG DSC_0122.JPG
  1. Optional:
    1. Adding bridges:
      1. Fold up index cards so that they are less than 1 cm wide.
      2. Place them under the strings, beneath the base of the neck. Tape it to the box on the sides so the tape won’t affect with the strings.
   Picture of Extra Things to Do
    1. Decorate!

How does it work?

  • Sound is transmitted through a pressure wave within a material. This pressure wave can be  https://img1.etsystatic.com/000/0/5333516/il_fullxfull.224312765.jpg
formed when the object is vibrating back and forth to push air forward and backward.                                        
  • Strings:
    • Mass of the string:
      • Mass is the amount of matter in an object. It does not change with gravitational force, and it is measured in Newtons. The mass of the guitar string affects the vibration. Thicker strings vibrate slower than thinner strings. The slower vibrations occur because the pressure waves are farther apart.
    • Tension in the string: The tension is referring to how tightly wound the strings are. If the tension is higher in the strings, it will create a higher pitch. If the tension is small, there is a lower pitch. The tension affects the pitch because a string that has stronger tension will vibrate more, which means the pressure waves are closer together.
    • Length of the string: The frequency is the measure of how fast the vibrations are. You would change the length based on where you place your fingers. If you don’t put your finger and strum it, it would create a lower pitch. This action is called an open chord. If you place your finger on the string, it would shorten the length, which gives a higher pitch.

References:


Wednesday, January 27, 2016

Baking Soda Bubbles

Materials
  1. 1/4 cup of baking soda  
  2. 1 cup of vinegar
  3. Bubbles and a bubble wand (you can get this at most toy stores)
  4. 2 large, clear containers, like a clear plastic or glass bowl
  5. Small clear cup
  6. Bowl
  7. Spoon

Instructions
  1. Put 1/4 cup baking soda in a clear container.
  2. Then add 1 cup of vinegar.
  3. The mixture of vinegar and baking soda will bubble. It's making carbon dioxide.
  4. Blow some bubbles into the container and watch how they float on the carbon dioxide. The bubbles are floating where the carbon dioxide and air meet.

Explanation
  1. The carbon dioxide stays at the bottom of the bowl because it is more dense than the air in the bowl. The bubbles float on top of the carbon dioxide because they are filled with air and the air is less dense than the carbon dioxide.
  2. This will help explain what density means. Pretend that you had two balloons and you filled one with air, and the other one with the same volume of carbon dioxide. The balloons would be the same size, because the gas in them takes up the same amount of space.
  3. But, if you weighed both balloons, the one with the carbon dioxide would be heavier. This means that it's denser than the balloon with air in it.
  4. If you still don't understand density, don't worry. There are lots of people out there who can answer your questions. Talk to your teacher, go to a science museum, visit your local library, or ask your parents.

Wednesday, January 20, 2016

Harry Potter and the Levitating Orb

the-floating-orb.jpgWingardium Leviosa! Have you ever wondered how the wizards in Harry Potter were able to make things levitate at the command of their wands? Though many of us, unfortunately, do not have the power of magic, we do have science that can make help us make some fantastic things happen! Check out the quick and easy experiment below to find out how you can impress your friends with the simple magic of science.

Materials:
  • 1 inch (2.5 cm) wide PVC Pipe about 24 inches (60cm) long (alternate to this can be a balloon but best results are with a PVC Pipe)
  • Mylar tinsel from Christmas trees (recommended to find no thicker than 1 mm in width. Thinnest and most narrow tinsel should be used for best results.)
  • Head full of good, dry hygienic hair
  • Scissors
  • Ruler

Procedure:
  1. Gather 6 strands of mylar together and tie them in a knot. Make sure the knot is near the end of the mylar strand. The knot should be approximately 1 inch from the end. Ask an adult if you need help with this step.
  2. Tie another knot in the same manner approximately 6 inches (15 cm) from the first knot. Again, the knot should be approximately 1 inch from the end of the mylar bundle.
  3. If necessary, cut off any extra mylar off the end of the knots.
  4. 7489997.pngNow it’s time to charge your PVC pipe. Rub the pipe back and forth on a head full of clean, dry hair for at least 20 seconds.
  5. Hold the mylar orb by the knot and hold it over the now charged PVC pipe.
  6. Drop the mylar orb directly on top of the PVC pipe.  
  7. The orb should repel from the charged pipe. Keep the pipe under the orb and try to move it around. Now you have a levitating orb under the control of your wand (PVC pipe)! If the orb sticks onto the PVC pipe, the mylar tinsel is mostly likely too thick. Try obtaining a thinner kind and perform the experiment again.

Note: The PVC pipe will need to be recharged each time you wish to levitate the orb.

What Happened:
The scientific phenomenon that is occurring in this experiment is called static electricity. In this case, “charging” the PVC pipe by rubbing it on your head makes the pipe have a negative charge. The orb has a positive charge at first, as seen when the orb is dropped on the pipe, the instantly gains a negative charge once it touches the pipe. Right after this, the pipe and orb have negative charges. Same charges make two things repel and this repulsion is what makes possible the orb to levitate upon contact with the pipe. In addition, the orb becomes a ball shape after encountering the pipe because the charged orb has strands that all have negative charges and would like to be as far as possible from each other.

For more information on this experiment, such as videos and where to find materials, or other fun experiments check out: ScienceBob.com 

Happy levitating!